Managing Insurance Adjuster Home Inspections: 2026 Guide
Table of Contents
What Happens During an Insurance Adjuster Home Inspection
Staff, Independent, and Public Adjusters: Who Shows Up
How Adjusters Document Visible Damage and Collect Evidence
Preparing for an Insurance Adjuster Inspection: A Step-by-Step Walkthrough
What to Do the Week Before the Visit
What to Do on Inspection Day
Your Home Insurance Claim Documentation Checklist
Photos, Receipts, and Proof of Loss
Building a Contents Inventory That Holds Up
Questions to Ask an Insurance Adjuster During the Visit
How to Handle an Insurance Adjuster Damage Estimate Dispute
Getting a Contractor Estimate That Counts
After the Inspection: Tracking Your Claim to Settlement
Build a Claim Log You Can Hand to Anyone
The Written-Confirmation Cadence
When the Estimate Comes in Low: A Documented Escalation Ladder
If Part of Your Claim Is Denied
Policy and State Rules Vary, Verify Yours
Frequently Asked Questions
Last Updated: October 12, 2026
What Happens During an Insurance Adjuster Home Inspection
An insurance adjuster home inspection is a visit where a claims professional examines your property, documents damage, and builds the file that decides your payout.
The adjuster is not your enemy, but they are not your advocate either. Their job is to measure your loss against your policy; your job is to make sure nothing gets missed.
The inspection usually follows a set order:
Review of your claim and policy coverage
Walkthrough of each damaged room or area
Photos and measurements of visible damage
Questions about how and when the loss happened
A written or digital report filed to your claim
Most visits take under an hour. Complex water or fire losses can run longer.
Key Takeaway The adjuster writes the first version of your claim's story. Anything you do not show or say during the visit may not make it into that story.
Staff, Independent, and Public Adjusters: Who Shows Up
Three types of adjusters handle home claims, and knowing which one is at your door changes how you prepare.
Staff adjusters work directly for your insurance company, handling most routine claims under the insurer's guidelines.
Public adjusters work for you, usually for a percentage of your settlement, and represent your interests.
Adjuster Type | Works For | Paid By | Best For |
Staff | Insurance company | Insurer salary | Routine claims |
Independent | Insurer (contract) | Insurer fees | Storm surge periods |
Public | You, the homeowner | Percentage of settlement | Complex or disputed claims |
Most homeowners deal with a staff or independent adjuster. You just need to know who is representing whom.
How Adjusters Document Visible Damage and Collect Evidence
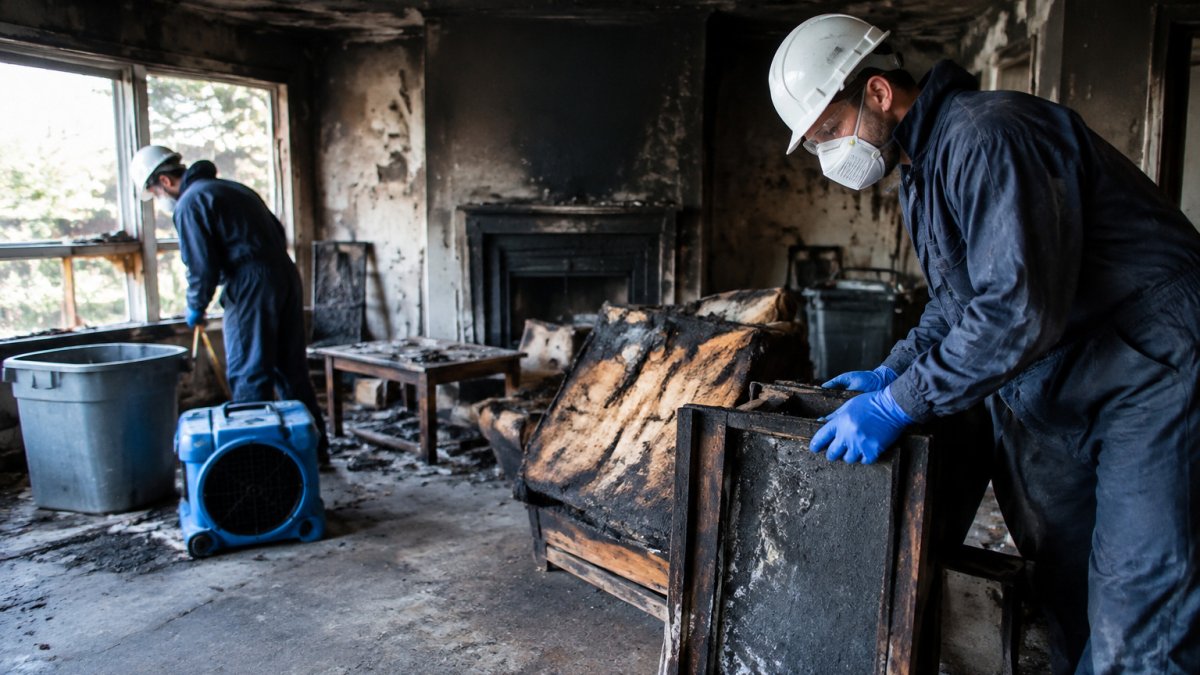
Adjusters document visible damage through photographs, measurements, and notes, then match what they see to your policy's covered loss terms.
What they cannot see, they cannot claim. That single fact drives everything in this guide.
A common mistake is assuming the adjuster will crawl into the attic or pull back wet flooring. Many will not. If damage sits behind a wall or under a cabinet, say so and ask how it gets documented.
Preparing for an Insurance Adjuster Inspection: A Step-by-Step Walkthrough
Preparation starts the week before the visit and continues through the day itself.

What to Do the Week Before the Visit
The week before is for gathering, not fixing. Pull your policy and read the sections on coverage, exclusions, and deductible, then confirm your loss date matches the claim.
Then work through this list:
Photograph every damaged area from multiple angles
Photograph the same areas before any cleanup or repair
Collect receipts for emergency repairs or temporary lodging
Write a timeline of when the damage happened and what you did
Do not throw anything away before the inspection. Discarded items are hard to claim later.
Watch Out Cleaning up or repairing before the adjuster sees the damage can reduce your payout. The adjuster needs to see the loss in its original state. Photograph first, then mitigate what you must.
What to Do on Inspection Day
On the day of the visit, walk the property with the adjuster. Do not hand over the keys and leave, you want to hear what they note and point out what they miss.
Keep these habits:
Stay with the adjuster the whole time
Point out every area of damage, even small ones
Mention hidden damage and where it might be
Ask what each finding means for your claim
Then let them finish.
Your Home Insurance Claim Documentation Checklist
Strong documentation is the backbone of a fair claim. A home insurance claim documentation checklist keeps you organized and gives the adjuster fewer reasons to question your loss.
Public Adjuster Show with Vince Perri
Photos, Receipts, and Proof of Loss
Photos should be dated and show scale. Place a ruler or coin next to damage for size reference. Shoot wide shots of the room, then close-ups of the damage itself.
Keep these documents ready:
Receipts for emergency mitigation and repairs
Contractor estimates and inspection reports
Proof of loss form, completed and signed
Any correspondence with your insurer
Hotel or rental receipts if you relocated
Your proof of loss is a sworn statement. Read it carefully and make sure the numbers match your evidence.
Building a Contents Inventory That Holds Up
A contents inventory lists every damaged belonging with enough detail to value it. Vague lists get cut. Specific ones get paid.
For each item, record:
Description and brand
Approximate age
Where it was in the home
Replacement cost or actual cash value
A photo if you have one
The difference between replacement cost and actual cash value matters here. Replacement cost pays what it costs to buy the item new. Actual cash value pays today's value minus depreciation. Check which one your policy uses.
Pro Tip Walk through your home with your phone camera before any loss and store the video in the cloud. A pre-loss home inventory is the fastest way to prove what you owned.
Questions to Ask an Insurance Adjuster During the Visit
The right questions turn a one-way inspection into a two-way conversation. Ask them plainly and write down the answers.
What damage did you document today?
What is not covered under my policy, and why?
How long until I get the written estimate?
Will a second inspection be needed?
How do I submit additional evidence later?
If an answer is vague, ask again. You are entitled to clear information about your own claim.
How to Handle an Insurance Adjuster Damage Estimate Dispute
Disputes are normal. When your adjuster's damage estimate comes in lower than your contractor's, you have options.
First, compare the two estimates line by line. Often the gap is a missed item, not a disagreement about value. Second, send your contractor's estimate to the adjuster with photos and notes.
If the gap remains, ask about your policy's appraisal clause. Many policies include a process where each side hires an appraiser and a neutral umpire settles the difference, a formal step to use when informal talks stall.
Getting a Contractor Estimate That Counts
A contractor estimate carries weight when it is detailed and matches the damage. Ask your contractor to:
List each repair as a separate line item
Include measurements, materials, and labor
Note any damage the adjuster did not record
Attach photos and any test results
A one-page lump-sum quote rarely moves an adjuster. A room-by-room breakdown usually does.
This is where a claim partner helps. Rapid Refurb communicates directly with adjusters, documents damage in the format insurers expect, and pushes back when scope is cut. We have handled water, storm, and fire claims, and we know what a complete estimate looks like.
After the Inspection: Tracking Your Claim to Settlement
The inspection is not the finish line. It is the starting point for the paperwork that follows, and the phase where most claims are won or lost on documentation, not argument.
Build a Claim Log You Can Hand to Anyone
Track every touchpoint in one place. A spreadsheet or a notebook works; what matters is consistency.
Date of each call, email, text, or visit
Name and role of the person you spoke with
What was discussed, promised, or requested
Documents you sent or received, with file names
Deadlines mentioned (proof of loss, additional documentation, appeal windows)
Follow up in writing after every phone call. A short email summary, "Confirming our call today, you said X and I agreed to send Y by Z", protects you if details get lost when the file is reassigned.
The Written-Confirmation Cadence
A simple rhythm keeps your file clean and makes escalation easier if you need it:
Same day, send a confirmation email summarizing the inspection or call.
Weekly, check claim status and log the update, even if the answer is "no change."
On every request, respond in writing, and ask for written confirmation when the insurer acknowledges receipt.
Before any deadline, send documents early enough to get a timestamped reply.
Claim decisions move on their own timeline, and delays are common. Stay patient but persistent. Check your claim status weekly, respond to requests quickly, and keep every document in one folder.
When the Estimate Comes in Low: A Documented Escalation Ladder
Disagreements about scope or value are normal.
Step 1, Compare line by line. Put the adjuster's estimate next to your contractor's. Most gaps are missed items, not price disagreements.
Step 5, Escalate inside the company. Ask for the adjuster's supervisor or the claims manager in writing.
Step 6, Know your outside options. Every state has a department that regulates insurers and accepts consumer complaints.
Watch Out Do not accept a partial payment as "final" if you believe scope is missing. Read any release or settlement letter carefully, signing one can limit later supplements. If you are unsure, get the language reviewed before you sign.
If Part of Your Claim Is Denied
A denial is not always final. Ask for the reason in writing, then compare it to your policy's exclusions and your file. Many denials get revisited when new documentation arrives, a contractor's report, an engineer's opinion, or photos showing damage the first inspection missed.
If the denial cites a policy exclusion, read it word for word. If it cites a deadline, check whether you met it and whether the insurer acknowledged your submission.
Policy and State Rules Vary, Verify Yours
Procedures, deadlines, recording laws, appraisal triggers, and complaint processes differ by policy and state. Nothing here replaces your policy language or local rules.
This is where a claim partner helps. Rapid Refurb communicates directly with adjusters, documents damage in the format insurers expect, and pushes back when scope is cut. We have handled water, storm, and fire claims, and we know what a complete estimate looks like.
Frequently Asked Questions
What should I do before a home insurance adjuster inspection?
Document everything first. Photograph and video each damaged room from multiple angles, including wide shots and close-ups of stains, cracks, or water lines. Gather receipts for anything you bought to prevent further damage, plus any contractor estimates you already have. Clear a safe path so the adjuster can reach the attic, crawlspace, and roof access. Write down the loss date and a short timeline of what happened. This preparation for an insurance adjuster inspection gives you a record to compare against the adjuster's findings.
Can I record an insurance adjuster's inspection?
Rules vary by state and by insurer, so ask before you start recording. Many adjusters agree to audio notes or allow you to take your own photos and videos alongside theirs. If recording is declined, keep written notes with timestamps instead. Never sign anything during the visit that you have not read fully, and request a copy of the adjuster's report once it is filed. Your claim file should include every document exchanged.
What should I do if I disagree with the adjuster's damage estimate?
Request the written estimate and compare it line by line against your own documentation. Look for missing scope items, such as hidden water damage behind drywall or code-required upgrades. Get an independent contractor estimate and submit it with photos and a written explanation of what was missed. Ask the adjuster to clarify how replacement cost and actual cash value were calculated, and how your deductible was applied. If the gap remains, ask about the appraisal clause in your policy.
How long does it take to get a claim decision after the inspection?
Timelines depend on the insurer, the size of the loss, and how complete your documentation is. Simple claims with clear visible damage often move faster than complex ones involving hidden structural issues or contents inventory. Ask the adjuster for a written estimate of when you will receive the report and the claim decision. Follow up in writing every week or two, and keep a log of who you spoke with and what was said so nothing falls through the cracks.
A home inspection after a loss is stressful, and the paperwork can feel endless. You do not have to manage it alone. Rapid Refurb acts as your claim partner, handling adjuster communication, documenting damage the right way, and managing the full repair from mitigation to finished interiors. Our team is licensed and insured, responds fast, and keeps your claim moving toward approval. Get started with Rapid Refurb and get your home, and your peace of mind, back on track.
Get Quote



Comments