Home Damage Recovery Guide: What to Do After Water Damage
Table of Contents
What to Do After Water Damage: First 24 Hours
Damage-Specific Safety: When to Evacuate and What to Avoid
Immediate Safety Precautions and Hazards
Initial Damage Assessment and Documentation
How to Document Property Damage for Insurance
Photos, Videos, and Inventory Lists
The Home Damage Insurance Claim Process
Working with Adjusters and Handling Denials
Water Removal, Drying, and Mold Prevention
Debris Removal and Sanitation
Water Damage Restoration Timeline
Securing Your Property and Preventing Further Damage
Costs, Coverage, and Temporary Housing Decisions
Frequently Asked Questions
Last Updated: October 17, 2026
What to Do After Water Damage: First 24 Hours
The first 24 hours after water damage decide how much of your home survives intact.
The clock matters because water keeps moving. It wicks up drywall, seeps under flooring, and feeds mold in damp cavities.

Damage-Specific Safety: When to Evacuate and What to Avoid
Safety guidance is not one-size-fits-all. The hazards you face depend on what caused the damage, and the wrong move can turn a repairable loss into a life-threatening situation.
Damage Type | Evacuate If... | Key Hazards | Leave to Professionals |
Clean water (burst supply line, appliance) | Water is near outlets, panels, or appliances, or ceilings sag | Electrical shock, slip-and-fall, hidden structural softening | Breaker work in wet areas, ceiling demolition, subfloor removal |
Contaminated water (sewer backup, outdoor flooding) | Always, until the source is stopped and the area is assessed | Bacteria, viruses, parasites, chemical runoff, sharp debris | Extraction, sanitation, porous-material removal, air quality testing |
Storm or wind damage | Roof, windows, or walls are breached, or trees are down on the structure | Falling debris, exposed wiring, gas leaks, structural collapse | Roof tarping above ground level, structural shoring, utility shutoff |
Fire or smoke residue | Soot is heavy, the structure is charred, or the power is out | Toxic smoke residue, hidden hot spots, weakened framing, air quality | Soot removal, HVAC cleaning, char demolition, odor treatment |
A few rules apply across every damage type. Never enter standing water if the power is on and you cannot confirm the circuit is dead.
If you smell gas, see sparks, hear crackling, or notice the structure shifting, leave immediately and call 911 from outside. For non-emergency utility issues, call your utility provider's emergency line before re-entering.
Immediate Safety Precautions and Hazards
Safety comes before cleanup, every time. Water and electricity are a lethal combination, so shut off power to affected areas at the breaker panel if you can reach it safely, and never wade into standing water near outlets or appliances. Watch for sagging ceilings, soft floors, and slick surfaces. If the water came from a storm or sewer backup, treat it as contaminated and keep skin contact to a minimum. When in doubt, leave the house and call for help.
Initial Damage Assessment and Documentation
Once the area is safe, walk through with a camera before you move anything. Photograph standing water, damaged belongings, and every affected surface. Note the date, time, and likely source of the water. This initial damage assessment becomes the backbone of your insurance claim, and adjusters respond far better to organized evidence than to a verbal description. Write down what you see room by room while it is fresh.
How to Document Property Damage for Insurance
Good documentation is the difference between a claim that sails through and one that stalls for months. The goal is a complete, timestamped record that connects the damage you see to the cause and the cost of fixing it. Start the moment it is safe to do so, and keep everything in one folder, digital or physical.
Pro Tip Photograph the water source itself, not just the damage. Adjusters need to see where the water entered to confirm the cause, whether that is a burst supply line, a failed water heater, or a roof breach. A picture of the source saves weeks of back-and-forth. ::: Documenting these structural vulnerabilities provides the necessary insight for preventing roof leaks before they escalate into catastrophic interior flooding. Photos, Videos, and Inventory Lists Build three layers of evidence. First, wide photos of each affected room showing the full scope. Second, close-ups of damage: warped flooring, stained drywall, ruined furniture. Third, a short walkthrough video narrating what you see. Then create an inventory list of damaged items with brand, age, and estimated replacement value where you can. Personal property documentation is the part most homeowners skip, and it is often the largest part of the payout. Evidence Type What to Capture Why It Matters Wide photos Each affected room, full scope Establishes extent of damage Close-ups Warped floors, stained drywall Proves severity and cause Walkthrough video Narrated tour of the damage Ties the whole story together Inventory list Item, brand, age, value Supports personal property payout Receipts and records Purchases, prior repairs Verifies value and pre-loss condition The Home Damage Insurance Claim Process The home damage insurance claim process moves through a predictable sequence: report the loss, document it, meet the adjuster, receive an estimate, negotiate, and get approval. The single biggest mistake we see is filing before documenting. Report promptly, because most policies require prompt notice, but have your photos and inventory ready when you call. Ask for the claim number and the name of your assigned adjuster, and keep a written log of every conversation, date, and decision. Working with Adjusters and Handling Denials Adjusters are busy professionals managing many claims, and a well-organized file gets their attention. Walk them through your documentation, point out hidden damage they may have missed, and ask them to note anything they cannot see. If part of your claim is denied, do not accept the first answer. Request the denial in writing, ask for the specific policy language behind it, and submit additional evidence. A documented supplement often reverses a partial denial. Never begin permanent repairs before the adjuster has inspected the damage. Tearing out drywall or replacing flooring too early can void coverage for that portion of the claim. Emergency mitigation to stop further damage is fine, but hold permanent work until you have written approval.
Water Removal, Drying, and Mold Prevention
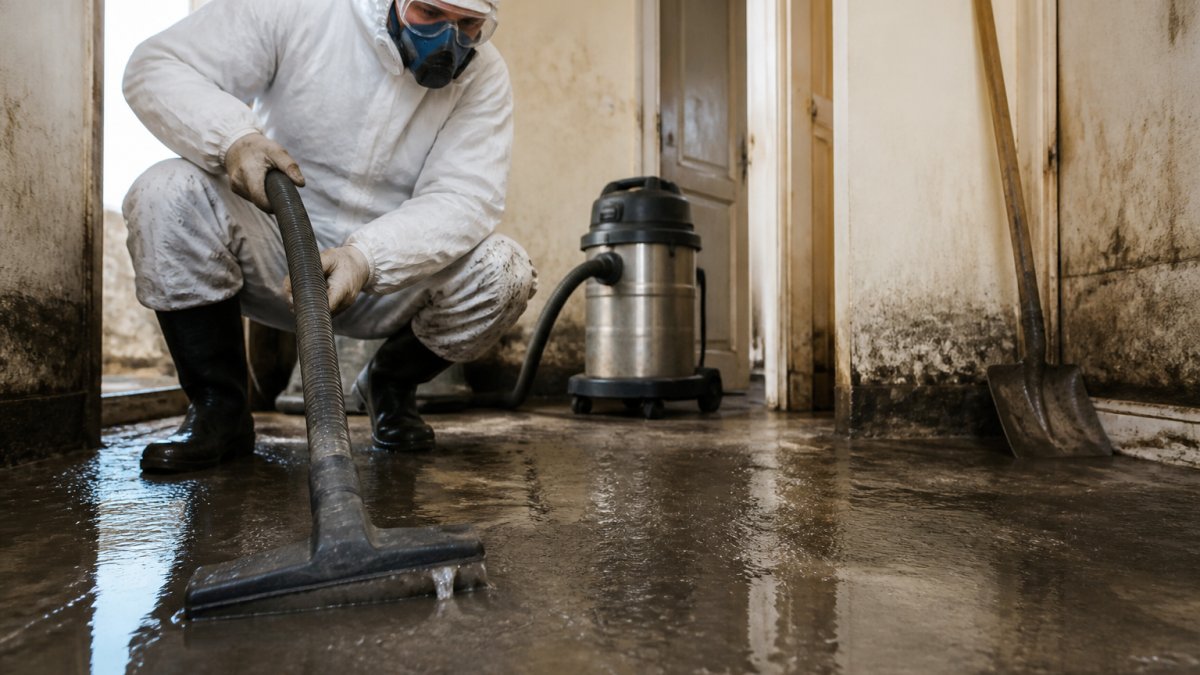
Water extraction comes next, and speed is everything. Standing water should be pumped or vacuumed out as soon as it is safe. Pumps handle deeper water, wet vacuums handle carpet and upholstery. After extraction, the real work begins: drying the structure itself. Air movers keep air circulating, dehumidifiers pull moisture from the air, and together they pull water out of framing, subfloor, and drywall. Mold can begin growing in damp materials within a day or two, so drying cannot wait.
Debris Removal and Sanitation
Once the water is gone, clear out ruined materials and clean what remains. Bag and remove soaked carpet, padding, insulation, and drywall that cannot be saved. Sanitize hard surfaces that contacted contaminated water, and dispose of porous items that cannot be properly cleaned. This step also protects indoor air quality, since damp debris is a mold magnet.
Water Damage Restoration Timeline
A realistic water damage restoration timeline depends on the extent of damage, but the phases rarely change. Here is how the work typically unfolds.
Phase | Typical Duration | What Happens |
Emergency response | Same day | Safety check, water shutoff, documentation |
Water extraction | 1-2 days | Pumping and vacuuming standing water |
Drying and dehumidification | 3-5 days | Air movers and dehumidifiers run continuously |
Cleanup and sanitation | 1-3 days | Debris removal, sanitizing surfaces |
Repairs and rebuilding | Days to weeks | Drywall, flooring, paint, structural work |
Final inspection | 1 day | Walkthrough and sign-off |
Small, contained leaks move fast. Whole-room flooding or storm intrusion stretches the drying phase. We build the schedule around moisture readings, not the calendar, because materials have to be genuinely dry before repairs begin.
Securing Your Property and Preventing Further Damage
Property securing protects what the water did not already ruin. Board up broken windows, tarp a damaged roof, and shut off the water supply to any failed line. These steps limit further damage and show your insurer you acted responsibly. After the immediate crisis, prevention pays off: know where your main water shutoff is, inspect supply lines and the water heater annually, and keep gutters clear so storm water drains away from the foundation.
Key Takeaway The homeowners who recover fastest are the ones who document thoroughly, mitigate quickly, and keep every receipt. Insurance rewards a clean paper trail, and a clean paper trail starts in the first hour.
Costs, Coverage, and Temporary Housing Decisions
Costs vary widely with the scope of damage, and no honest contractor will quote a firm number before seeing the site. Most homeowners policies cover sudden water damage from burst pipes or appliance failures, while gradual leaks and neglected maintenance are often excluded.
This is where an experienced claim partner earns their keep. Our licensed and insured team handles the full scope, from water extraction and drying to interior remodeling of kitchens, bathrooms, and flooring, and we manage the entire repair project so you can focus on getting your life back to normal.
Water damage rarely announces itself politely, and the recovery process can feel overwhelming when you are standing in a wet living room. The right partner makes the difference between months of stress and a home restored properly.
Frequently Asked Questions
What should I do first after my home is damaged?
Your first priority is safety. If the damage involves water, fire, or structural issues, turn off the power and gas if you can do so safely, and evacuate if there is any doubt about structural integrity. Once safe, document the damage with photos and video before moving anything. Then contact your insurance company to start the home damage insurance claim process. Avoid entering rooms with sagging ceilings or standing water near electrical outlets. A professional restoration assessment can confirm whether it is safe to remain in the home.
How do I know if it is safe to enter a damaged home?
Do not enter if you see sagging ceilings, cracked walls, or a smell of gas. If water is still rising or there is visible electrical damage, stay out. For floodwater, assume it is contaminated and wear protective clothing if you must go in briefly. A licensed restoration professional can perform a structural damage assessment and check for hidden hazards like compromised load-bearing walls or electrical systems. When in doubt, wait for professional clearance before re-entering your home.
How should I document home damage for an insurance claim?
Take clear photos and videos of every affected room, including close-ups of damaged items and wide shots showing the extent of the damage. Do not throw away damaged items until the adjuster has seen them. Create a written inventory list with descriptions, purchase dates, and estimated values. Keep receipts for any emergency repairs or temporary housing. This documentation is critical for how to document property damage for insurance and helps ensure your claim is processed smoothly.
What should I do if my home has water damage?
Shut off the water source if possible and turn off electricity to affected areas. Remove standing water with a wet vacuum or pump if it is safe to do so. Move furniture and belongings to dry areas, and start drying with fans and dehumidifiers. Contact a water damage restoration professional within 24 to 48 hours to prevent mold growth. Document everything for your insurance claim. If the water is from a flood, avoid contact and wait for professional help.
How do I prevent mold after water damage?
Mold can start growing within 24 to 48 hours of water exposure. The key is rapid drying. Use dehumidifiers and air movers to reduce moisture levels in the affected areas. Remove and discard porous materials like carpet, drywall, and insulation that have been soaked. Clean and disinfect hard surfaces. If the area is larger than 10 square feet or has been wet for more than 48 hours, hire a mold remediation professional. Keep indoor humidity below 60 percent to discourage mold growth.
How long does home damage restoration take?
The water damage restoration timeline varies by severity. Minor water damage might be dried and repaired within a week, while major flooding or storm damage can take several weeks to months. The process includes water extraction (1-2 days), drying and dehumidification (3-5 days), cleanup and sanitization (1-2 days), and repairs or rebuilding (days to weeks depending on scope). Fire and smoke damage may require additional time for soot removal and odor treatment. Your contractor can provide a more specific timeline after assessment.
Should I hire a restoration contractor or handle cleanup myself?
For small, clean water spills (like a sink overflow) you can often handle cleanup yourself with towels, fans, and a wet vacuum. However, for any water that is contaminated (floodwater, sewage), or if the affected area is larger than 10 square feet, or if there is structural damage, hire a licensed restoration contractor. Professionals have the equipment to dry thoroughly and prevent mold, and they can document the damage for insurance. Attempting major cleanup yourself may void your insurance claim or lead to hidden mold problems.
Get Quote



Comments